



Maintenance free battery
The batteries, which require virtually no maintenance, do not have unscrewable cell plugs. Checking the electrolyte level and its density is not necessary for these batteries, because the electrolyte does not evaporate.
Such batteries usually have a so-called "magic eye", which is an optical indicator of the electrolyte level. The electrolyte level and the battery charge level are determined by the change in color of the optical indicator.
- the color of the optical indicator is green. The battery condition and charge are normal.
- the color of the optical indicator is black. The battery is not charged or the charge is too weak.
- the optical indicator is colorless or yellow. The electrolyte has reached a critical state. The battery should be replaced.
Regular battery
A normal type battery differs from a maintenance-free battery in that it has unscrewable plugs on the top cover (see arrow in Illustration 2.16). This battery requires regular checking of the electrolyte level in the cells.
Checking the electrolyte level
The electrolyte should cover the battery plates. Its layer above the plates should be approximately 5 mm thick. For batteries with a plastic rib 1 in the filler hole, the electrolyte level should be at the top of this rib (see illustration 12.16).
Caution: When inspecting the battery, illuminate the cell openings with an electric flashlight.
16. Unscrew the plugs 2 using a wide screwdriver (see illustration).
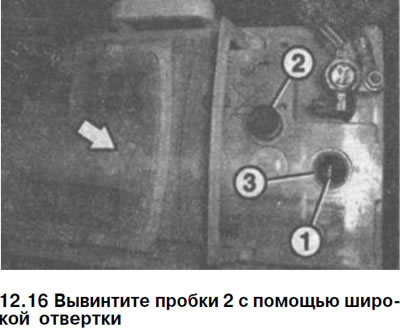
17. Add distilled water to cells 3 through a funnel, if necessary, bringing the electrolyte level in all cells to the norm. It is recommended to use a densimeter with a pipette (see illustration 12.16).
18. Screw in the plugs of 2 cells (see illustration 12.16).
19. Charge the battery and check its charging under load.
Checking the density of the electrolyte
The degree of electrolyte density in combination with voltage measurement data allows us to draw a conclusion about its condition.
To check, you need an acid meter, for example, HAZET 4650-1, which can be purchased at a specialized store
The temperature of the electrolyte of the battery being tested must be at least +10°C.
20. Turn off the ignition.
21. Use a screwdriver to unscrew the battery cell filler necks.
22. Lower the densimeter into the battery cell and remove enough electrolyte so that the densimeter float floats freely (see illustration).
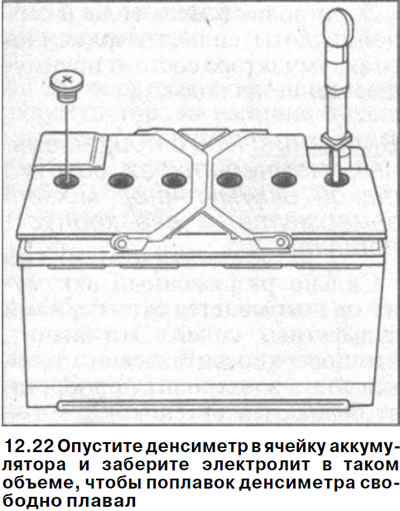
The greater the specific gravity (electrolyte density), the higher the float rises.
23. Determine the density of the electrolyte in specific gravity in g/ml or in degrees Baumé (+° Be) on the densimeter scale (see illustration). The density of the electrolyte should be at least 1.24 g/ml. If the density is less, the battery should be charged.
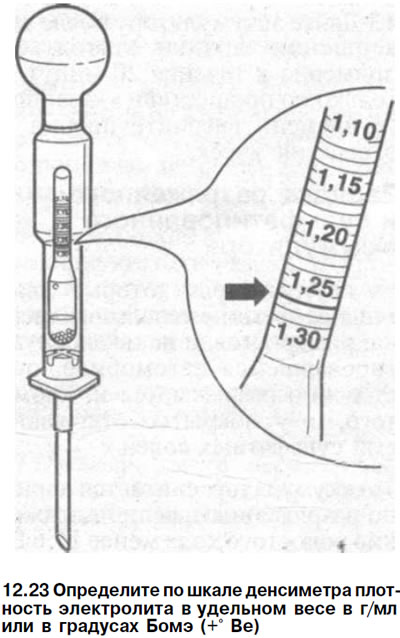
24. Check all the cells of the battery one by one. They should all have approximately the same density (maximum difference ±0.04 g/ml).
If the density of the electrolyte in the cells varies greatly, then it can be assumed that the battery is faulty.
25. Screw in the cell plugs.
Regular and maintenance-free batteries
Checking the battery under load
26. Connect the voltmeter to the battery terminals. Do not disconnect the wire terminals from the terminals
27. Start the engine and read the voltmeter readings.
When starting the engine, the battery voltage should not fall below 10 volts (at an electrolyte temperature of about +20(C). If the battery voltage drops immediately, and the cells have different electrolyte densities, then it can be assumed that the battery is faulty.
Checking the battery idle speed
The battery condition is checked with a voltmeter, which is connected to the battery terminals.
28. Remove the power wire terminals from the battery terminals.
The battery must be disconnected for at least two hours before testing.
29. Connect a voltmeter to the battery terminals and check the voltage (see illustration).
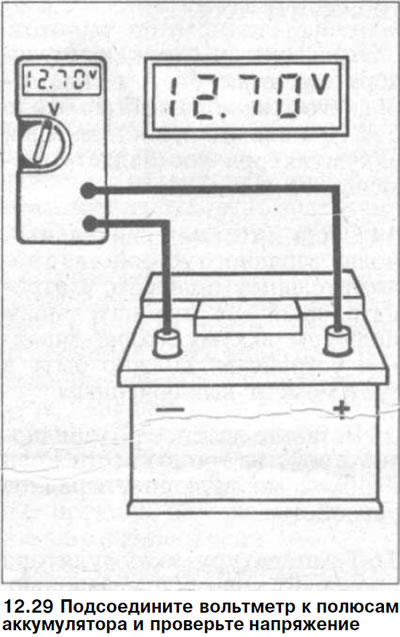
Evaluation of the obtained readings:
- 12.5V or higher - battery condition is good.
- 12.4 V or below - battery condition is unsatisfactory. Charge or replace the battery.
30. Connect the battery by securing the wire terminals to its terminals.
| Battery charge level | +°Be | g/ml |
| Discharged | 16 | 1,12 |
| Half discharged | 24 | 1,20 |
| Well charged | 30 | 1,28 |