



Removal
Note: Some steps are the same as when removing the rear part of the center console on cars produced before 2/01, where they are described in sufficient detail.
Caution! When working on the center console with the battery connected and without switching off the ignition, the airbag may be triggered. For this reason, disconnect the ground (-) cable terminal from the battery terminal.
1. Disconnect the ground (-) wire terminal from the negative battery terminal, after turning off the ignition.
If the radio has an access code, make sure that the code is written down before disconnecting the battery so that it can be entered into the radio later.
If the code is unknown, the radio receiver can be turned on by a specialized workshop or its manufacturer.
2. Insulate the negative battery terminal to prevent accidental short circuit to ground (-).
3. Remove the gear shift boot from the console, see the relevant chapter.
4. Remove the ashtray from the center console, see the relevant chapter.
5. Unscrew screws 1 (see illustration).
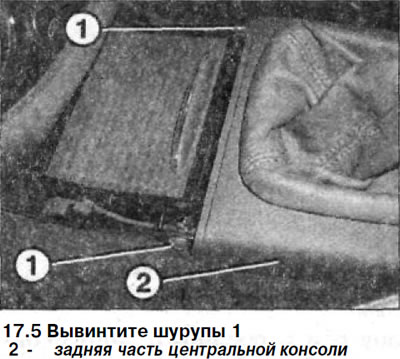
Please note: The illustration shows the gear shift lever without the cover removed.
6. Remove the trim from the parking brake lever.
Attention! This will damage the locking pin, which must be replaced with a new one during installation.
7. Remove the folding armrest above the rear of the center console.
8. Remove the cup holder and unscrew the screw underneath it.
9. Lift the center console and disconnect the connectors located underneath.
10. Lift the rear side of the rear center console above the parking brake lever, disconnect the air duct and remove the rear center console.
The rear part of the console is installed in the reverse order of removal. When installing the parking brake lever trim, their connecting latches should lock with a clearly audible click.