
Removing
1. Remove the seal from the footwell side trim.
2. Use a small screwdriver to pry off the plug on the footwell side trim and unscrew the screw underneath.
3. Pry off the footwell side trim with a plastic wedge and remove it.
4. Unscrew the screw which is under facing which fastens the bottom overlay of the panel of devices.
5. Remove the headlight range adjuster 1 by prying it with a plastic wedge (see illustration).
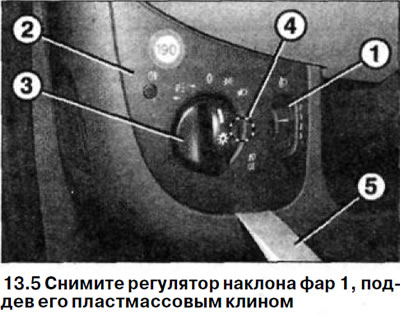
6. Remove light switch trim 2 using a suitable wire loop. Attach the loop near the rotary light switch at position 4, which corresponds to approximately three o'clock on the dial (see illustration 13.5). The trim can also be removed using a plastic wedge 5 (see illustration 13.5).
7. Disconnect the air duct lining by moving it to the left, carefully pressing out the stop tabs 6 (see illustration).
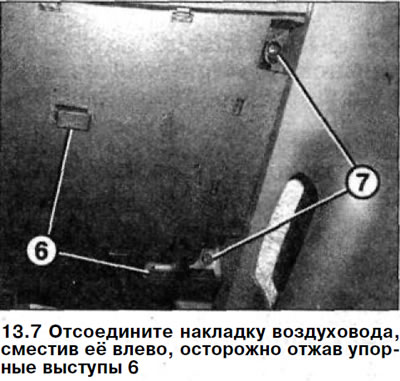
Attention! In the illustration, the duct cover has already been removed.
8. Unscrew the two screws 7 and lower the lower trim of the instrument panel so that you can disconnect the multi-pin plug of the light switch (see illustration 13.7).
9. Remove the clip from the diagnostic plug and disconnect it.
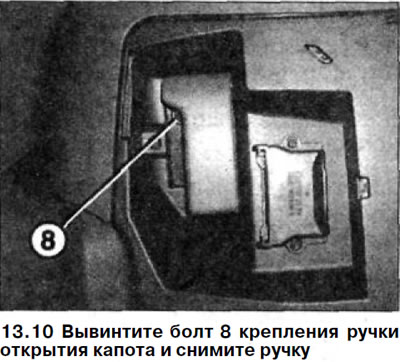
10. Unscrew the bolt 8 fastening the hood opening handle and remove the handle (see illustration).
11. Release the wire from the guide and remove the trim.
The lining is installed in the reverse order of removal.