

Instrument cluster installation details
Instrument cluster installation details
Details of installation of a casing of a combination of devices
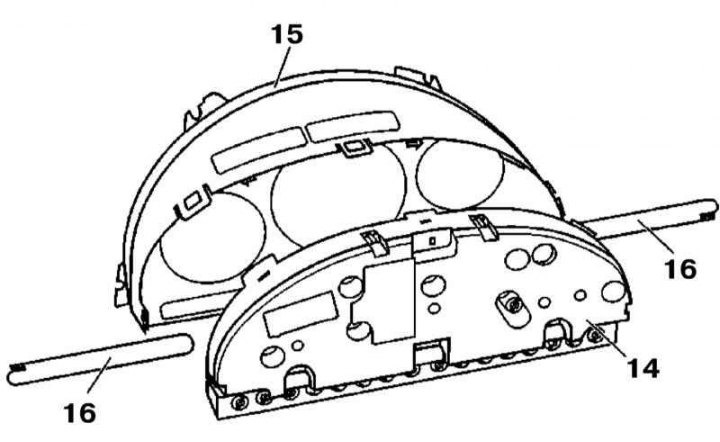
16 - Films with symbols
1. Details of the installation of the components of the instrument cluster are shown in the illustrations, which include all references in the text.
2. Disconnect the negative cable from the battery.
3. Unlock the steering column and lower it to its lowest position.
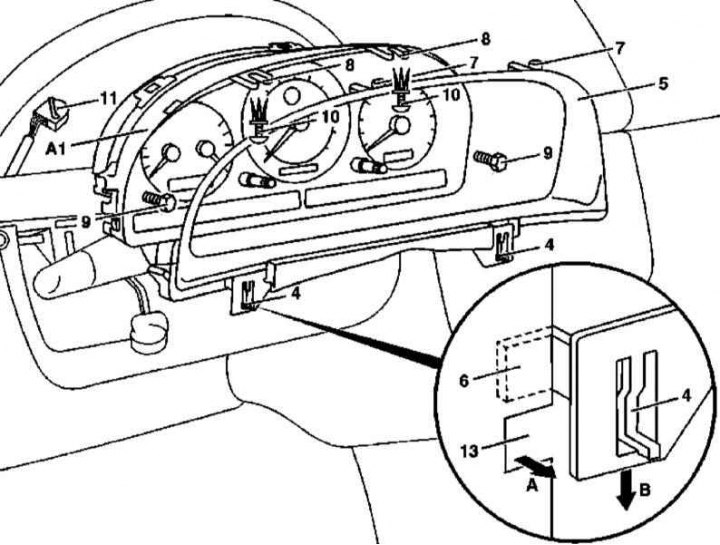
4. Remove the top section (3) cover of the steering column, - if equipped, release the side and front clamps, then slightly squeeze the cover and separate it from the instrument panel.
5. Using a suitable wedge, remove the side trim panels (12).
6. Pressing out (arrow A) clamps (4), and pulling down (arrow B), unframe (5) instrument cluster covers.
7. Remove the screws (9).
8. Remove the clips (10).
9. Pull instrument cluster assembly (A1) forward and disconnect the connector (11) electrical wiring, after releasing its lock.
10. Remove the instrument cluster (A1).
11. If necessary, release the latches and remove the combination from the casing (15) cover (14).
12. Installation is carried out in the reverse order - make sure that the adjusting buttons of the odometer and the clock fit correctly. When planting the frame (5) tuck hooks (6) into the mounting bracket (13) and, pressing the frame up, achieve a secure snapping of the latches, - tabs (7) must fall into the receiving sockets of the staples (8) combinations (A1).