



Contents: External tip ↡ Inner tip ↡
Note: All self-locking bolts and nuts must be replaced!
External tip
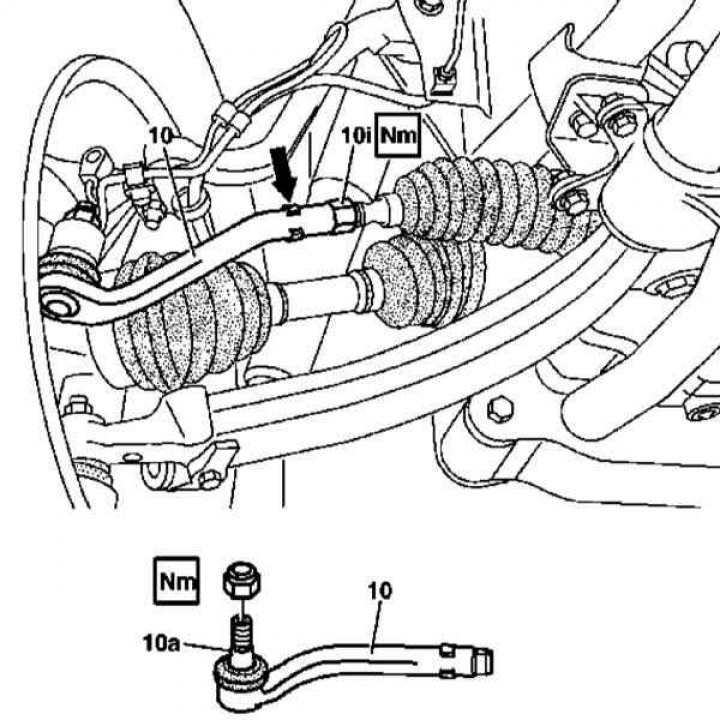
Outer Tie Rod End Installation Details
1. The installation details of the outer tie rod end are shown in the illustration to which all references in the text refer.
2. Using a suitable puller, release the tie rod end joint (10a) from the steering knuckle.
3. After fixing the tip motionless (arrow), release the lock nut (10i); the nut must be replaced without fail.
4. After marking its installation position, remove the tip (10).
5. Installation is carried out in the reverse order - make sure that the marks applied during dismantling are correctly aligned.
(Material taken from a web resource: «www.MercedesMan.ru»)
Inner tip
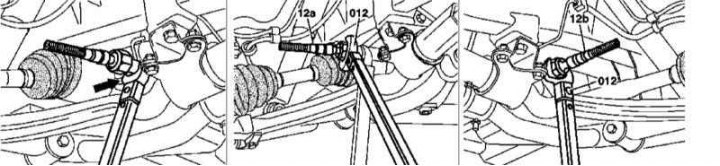
Removal/installing the inner tie rod end
Left Thrust | Left Thrust | Right Thrust
1. The relevant illustrative material is presented in the illustration, to which all references found in the text refer.
2. Remove the outer tip (see above).
Note: When servicing the right tie rod, also remove the left boot.
3. Holding the rack still with a 24 mm open-end wrench placed on the special flats, use a 36 or 38 mm open-end socket (012) to unscrew the hinge of the inner tip (12a/12b) - do not use extensions to the handle of the wrench or use a sledgehammer.
4. Installation is carried out in reverse order.