
Removing
Attention! When working on the center console with the battery connected without switching off the ignition, the ps airbags may be triggered. For this reason, disconnect the wire terminal «masses» (-) from the battery pole.
1. Disconnect the wire terminal from the negative pole of the battery «masses» (-), by turning off the ignition first.
If the radio has an access code, before disconnecting the battery, make sure that the code is written down so that it can be entered into the radio later.
If the code is unknown, then the radio can be turned on by a specialized workshop or by its manufacturer.
2. Insulate the negative battery terminal to prevent accidental shorts to «mass» (-).
3. Disconnect from the console a cover of the lever of a gear change, see relevant chapter.
4. Pry off the trim 1 of the switch block with a plastic wedge and remove it (see illustration).

5. Disconnect the multi-pin plug from the switch box.
6. Remove the plug of pin 2 on the parking brake lever and remove the pin (see illustration 7.4).
Attention! When removed, the pin is usually damaged and should be replaced.
7. Tighten the parking brake and remove facing plates 3 and 4 from the parking brake lever. At the same time, disconnect the docking protrusions 5 of the lining 4 (see illustration 7.4).
8. Remove, if required, the armrest above the console.
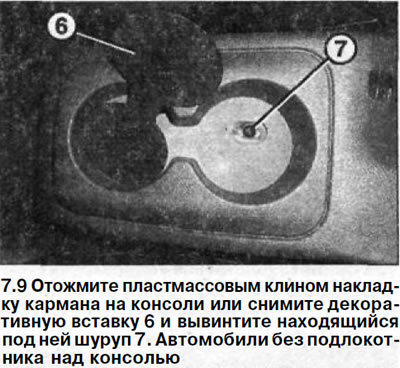
9. Cars without an armrest above the console. Use a plastic wedge to press the pocket lining on the console or remove the decorative insert 6 and unscrew the screw 7 located under it (see illustration).
10. Move the driver and passenger seats all the way forward.
11. Remove the side covers of the deflectors by prying them with a plastic wedge.
12. Move the rear of the center console back and carefully release its retaining tabs from the bottom of the center console.
13. Lift the back of the console up and remove through the parking brake lever.
Installation
14. Put the back of the console on the parking brake lever and fix its persistent ledges on the front of the center console.
Attention! Take some care when doing this, because the tabs are brittle and can break easily.
Further installation of the console is performed in the reverse order of removal.
15. Establish facing slips on the parking brake lever and fix their persistent ledges.
16. Insert a new pin into the hole on the facing of the parking brake lever and close with a new plug.