
Removing
1. Remove the deflector cover, see relevant chapter.
2. Remove the sealing lining 1 from the footwell upholstery 2 (see illustration).
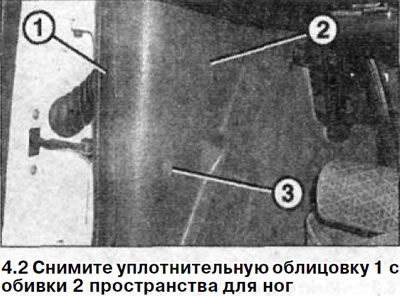
3. Pry off plug 3 with a small screwdriver and unscrew the screw underneath (see illustration 4.2).
4. Pry off the upholstery 2 of the footwell with a plastic wedge and remove it (see illustration 4.2).
5. Unscrew the bolts 4 and 5 and lower the lower trim 7 of the instrument panel so that you can disconnect the plugs of the outdoor lighting switch and the headlight range control (see illustration).
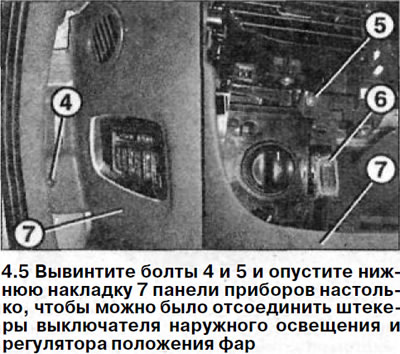
6. Disconnect plugs of the switch of external illumination and a regulator of position of headlights.
7. Remove the regulator from the panel.
6. headlight positions (see illustration 4.5).
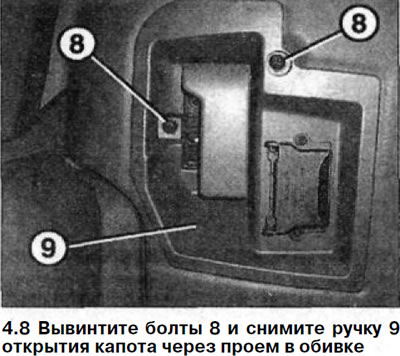
8. Unscrew the bolts 8 and remove the hood opening handle 9 through the opening in the upholstery (see illustration).
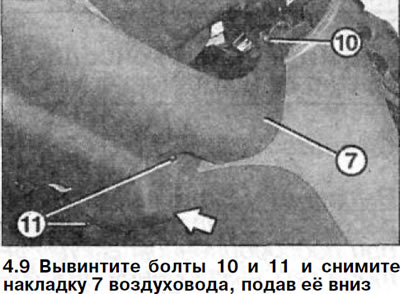
9. Unscrew the bolts 10 and 11 and remove the lining 7 of the air duct, pushing it down (see illustration).
Installation
10. Replace the duct cover. Get her in the right position.
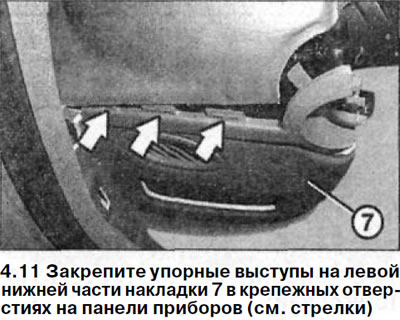
11. Fix the thrust tabs on the lower left side of the trim 7 in the mounting holes on the instrument panel (see arrows in illustration).
Further installation of dismantled parts is carried out in the reverse order of removal.