
Removing
1. Lower the door glass and remove the door trim, see relevant chapter.
2. Remove the inner door seal near the rear mounting hole on the door.
3. Remove the door handle, see relevant chapter.
Attention! It is not necessary to remove the door handle support bracket.
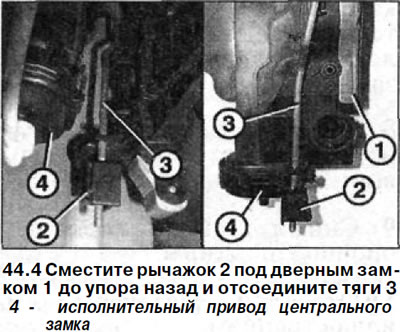
4. Move the lever 2 under the door lock 1 all the way back and disconnect the rods 3 (see illustration).
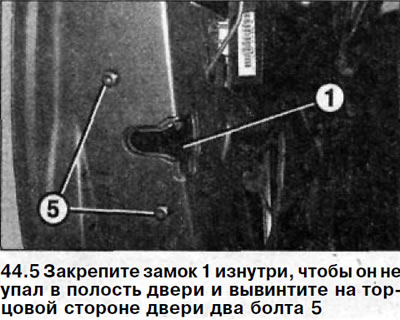
5. Fasten lock 1 from the inside so that it does not fall into the door cavity and unscrew two bolts 5 on the front side of the door (see illustration).
6. Lower the door lock down to the mounting hole.
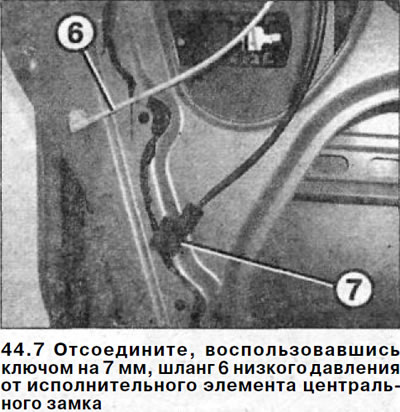
7. Disconnect, using a 7 mm wrench, low pressure hose 6 from the central locking actuator (see illustration).
Attention! Be careful not to damage the connector.
8. Release the plug of the microcontact (terminal) switch 7 on the door, pressing the leash, and disconnect it (see illustration 44.7).
Attention! In illustration 44.7, the central locking low pressure hose and the limit switch plug are shown in the disconnected position for clarity.
9. Remove the lock through the mounting hole with the connected rod.
Installation
10. Insert the lock with the fixed rod into the door cavity through the mounting hole.
11. Connect the plug of the door limit switch and fix it.
12. Connect the low pressure hose to the central lock actuator.
13. Install the door lock in place, screw in and tighten the bolts of its fastening with a force of 8 Nm.
14. Connect the lock rods and move the lever all the way forward.
15. Replace the door handle, see relevant chapter.
16. Glue the inner door seal near the lock and install the door trim in place, see relevant chapter.