



Contents: Removal ↡ Installation ↡
Cars with identification number 168.**475093 inclusive.
Removal
1. Remove the rear hatch trim, see the relevant chapter.
2. Unscrew the bolts 2 securing the lock 1 and remove it (see illustration).
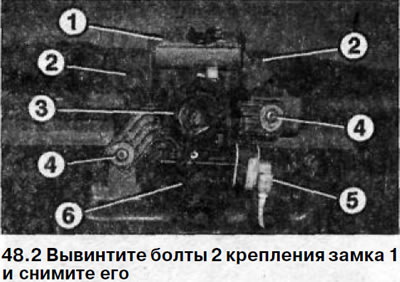
3. Remove the lock switch 3, unscrew the bolt of its fastening (see illustration 48.2).
4. Disconnect the low pressure hose 5 from the central lock actuator using a 7 mm spanner (see illustration 48.2).
Caution: Be careful not to damage the connector.
5. Release the plug of the micro-contact (limit) switch 6 on the door by pressing the leash and disconnect it (see illustration 48.2).
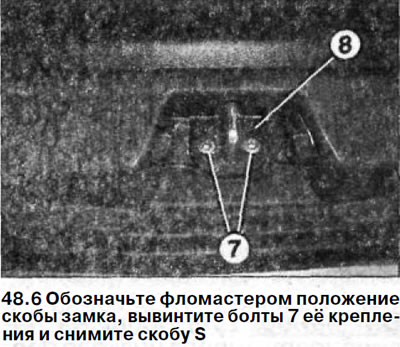
6. Mark the position of the lock bracket with a felt-tip pen, unscrew the bolts 7 that secure it and remove the bracket 8 (see illustration).
Installation
7. Install the lock bracket in place, following the marks made before removing it, and tighten the mounting bolts with a force of 9 Nm.
8. Connect the door limit switch plug.
9. Connect the low pressure hose to the central lock actuator.
10. Install the door lock in place and secure with bolts.
11. Replace the door trim, see the relevant chapter.
The installation of the remaining removed parts is carried out in the reverse order of removal.