
Removing
1. Remove the plug 1 on the inside of the door and unscrew the bolt 2 located under it with a socket head wrench (see illustration).
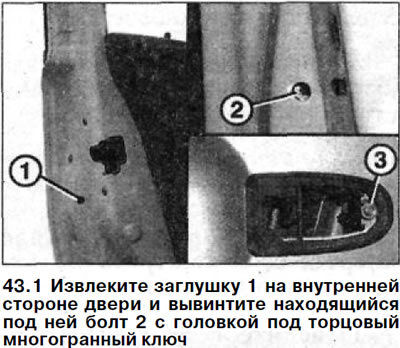
Attention! The bolt is prevented from falling into the inside of the door. However, after removing the door handle, it is recommended to additionally fix it by screwing on the nut 3 (see illustration 43.1).
2. Remove the switch guide (cylinder) 4 locks (see illustration).
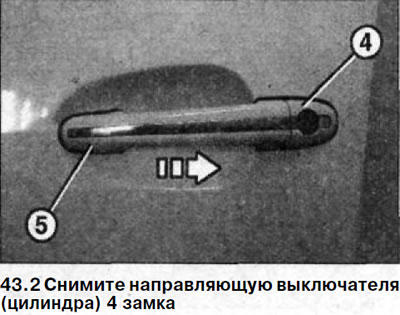
3. Move door handle 5 along the door surface in the direction shown by the arrow in illustration 43.2 and remove.
Attention! It is recommended to fasten bolt 2 after removing the handle with nut 3 so that it does not fall out (see illustration 43.1).
4. Remove the gaskets on the door handle.
Installation
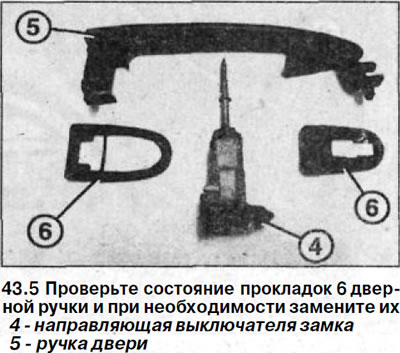
5. Check the condition of the gaskets 6 of the door handle and replace them if necessary (see illustration).
6. Install the handle with gaskets on the door and at the same time in the support bracket and the door lock opening lever. After that, move the handle along the surface of the door forward.
7. Check that the handle fits correctly in the mounting location. Remove and reinstall handle if necessary.
8. Insert the lock cylinder guide.
9. Screw in the socket head bolt and plug the hole with a plug.
10. Turn the lock pawl with a screwdriver and pull the handle. The dog should open.