
Nominal clearances:
- Gap between tailgate and roof — 7.0±0.5 mm
- Gap between tailgate and rear fender - 6.0±0.5 mm
Fit
15. Remove facing from a back crossbar of a roof.
16. Loosen the bottom hinge nuts.
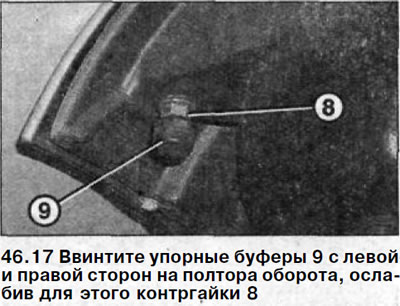
17. Screw in the stop buffers 9 on the left and right sides by one and a half turns, loosening the locknuts 8 for this (see illustration).
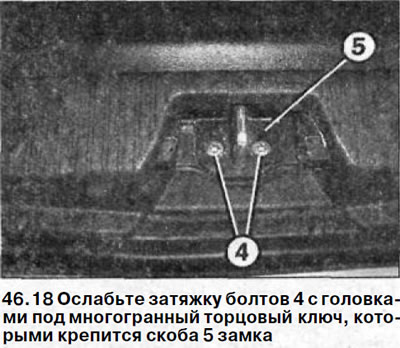
18. Loosen the bolts 4 with heads for a multi-faceted socket wrench, which fasten the bracket 5 of the lock (see illustration).
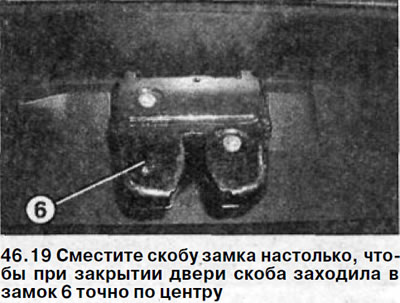
19. Move the lock bracket so that when the door is closed, the bracket enters the lock 6 exactly in the center (see illustration).
20. Tighten the bolts securing the lock bracket with a force of 9 Nm.
21. Fit the rear door so that its edges match the rear fenders.
22. Recheck the width of the gaps.
23. Tighten the hinge nuts to 9 Nm. If necessary, seal the mating surfaces of the hinges with an all-purpose sealant.
24. Make sure the tailgate closes easily. Otherwise, repeat the fit.
25. Establish into place facing of a back crossbar of a roof.
26. Loosen the bolts 7 with a multi-sided socket head, which fasten the hinges to the door and fit the rear door so that it coincides with the upper edge of the roof (see illustration 46.10). When doing so, observe the nominal gap between the roof.
27. Tighten the hinge bolts on the door.
28. Make sure the tailgate closes easily. Otherwise, repeat the fit.
29. Loosen the lock nut 8 and unscrew or screw in the stop buffers 9 of the door on the left and right sides so that they rest against it after closing (see illustration).
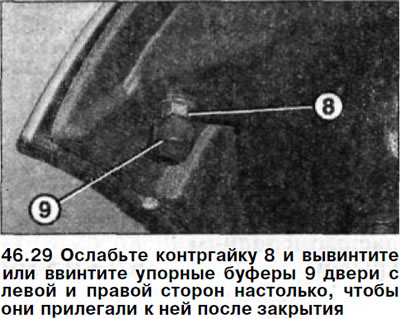
Attention! When the door is properly installed and fitted, the stop buffers should push the door out of the lock a little so that it opens when the lock drive button is pressed.
30. Tighten the lock nuts 8 of the left and right stop buffers 9 on the door (see illustration 46.29).
31. Make sure the tailgate closes easily. Otherwise, repeat the fit.