



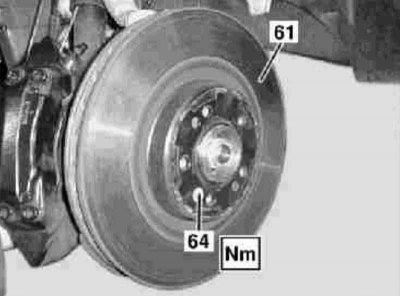
Brake Disc Installation Details (using the example of the front wheel brake mechanism)
Attention! Brake discs must be replaced in pairs for each axle!
1. Brake disc installation details (using the example of the front wheel brake mechanism) are shown in the illustration, to which all references found in the text refer.
2. Remove the wheels.
3. Check the remaining thickness of the friction linings of the brake pads and visually assess the general condition of the brake discs.
4. Remove the brake caliper (see Section Removal and installation the caliper), - there is no need to disconnect flexible brake hoses.
5. When removing the rear disc (61), release the parking brake and loosen the automatic drive cable tension adjuster.
6. Unscrew the lock bolt (64) and remove the brake disc - the bolt must be replaced without fail.
7. Installation is carried out in the reverse order - before installation, lightly lubricate the seating surface of the disk with consistent molybdenum-containing grease.
8. After replacing the rear brake discs, do not forget to adjust the parking brake drive (see Section Adjusting the parking brake drive) and relieve the load on the automatic regulator.
9. To seat the pads, press the foot brake pedal several times - a firm resistance to pressing should appear.
10. Check the brake fluid level in the master cylinder reservoir and make the appropriate adjustments if necessary.