



Contents: Removal ↡ Installation ↡
Removal
1. Remove the key from the ignition switch.
2. Disconnect the ground (-) wire terminal from the negative battery terminal, after turning off the ignition.
Warning! When you disconnect the battery from the radio, the security code is deleted, as well as all automatic settings on the radio station. If the code is unknown or not written down, then the radio can only be put into operation by resorting to the help of a workshop or the manufacturer of the radio. Therefore, make sure in advance that the code is known.
3. Open the hood.
4. Remove the brush holders, see the relevant chapter.
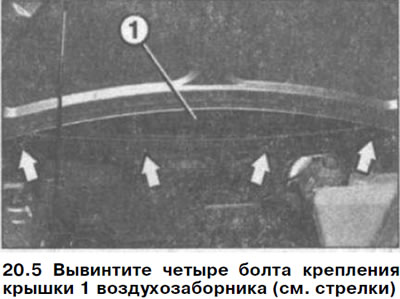
5. Unscrew the four bolts securing the air intake cover 1 (see arrows in the illustration).
6. Lift the air intake cover up and remove it by tilting the hood down.
7. Remove the washer reservoir by unfastening it.
8. Disconnect the hose supplying the washing fluid to the jets from the washer pump.
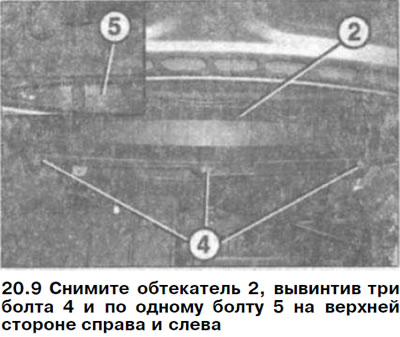
9. Remove fairing 2 by unscrewing three bolts 4 and one bolt 5 on the upper side on the right and left (see illustration).
10. Lift the fairing up and remove it.
11. Press the leash of the plug 1 of the wiper motor power supply with a screwdriver and disconnect the plug (see illustration).
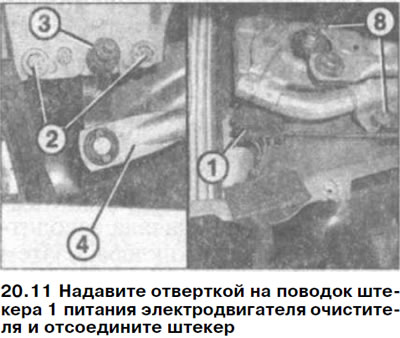
12. Unscrew the two bolts 2 and remove the right lever 3 from the crank (see illustration 20.11).
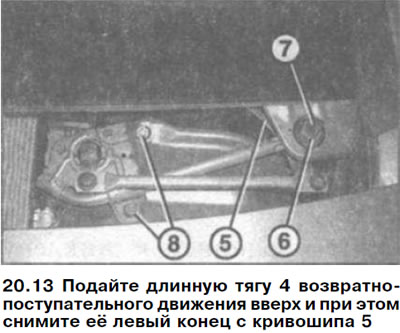
13. Move the long rod 4 in a reciprocating motion upwards and at the same time remove its left end from the crank 5 (see illustration).
14. Remove the right end of the long rod together with the shaft.
15. Unscrew nut 6, remove the lining washer and rubber gasket (see illustration 20.13).
16. Release the left crank 7 from the mount (see illustration 20.13).
17. Unscrew the two bolts 8 and remove the cleaner (see illustration 20.13).
Installation
18. Install the windshield wiper mechanism in place and secure with two nuts.
19. Secure the left crank 7 (see illustration 20.13).
20. Install the rubber gasket, washer and screw on the nut 6 (see illustration 20.13). The tightening torque of nut 6 is 15 Nm.
21. Attach the long rod to the crank arm 5 (see illustration 20.13).
22. Install the right crank and secure it with two bolts.
23. Connect the power plug of the windshield wiper motor.
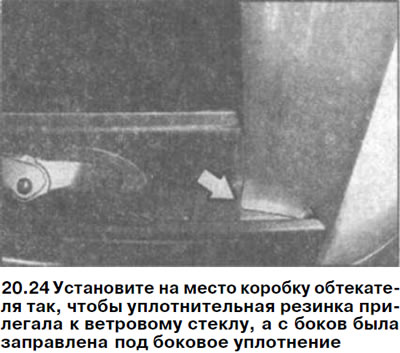
24. Install the fairing box in place so that the sealing rubber fits against the windshield and is tucked under the side seal on the sides (see arrow in illustration).
25. Secure the fairing box with five screws.
26. Connect the hose supplying the washing fluid to the jets from the washer pump and install the tank with the washing fluid in place.
27. Connect the jet heater plug.
28. Install the air intake cover onto the upper guides and secure it with four bolts.
29. Install brush holders.
30. Connect the battery ground (-) terminal. The ignition must be off.
31. Enter the security code into the radio and set the clock.