



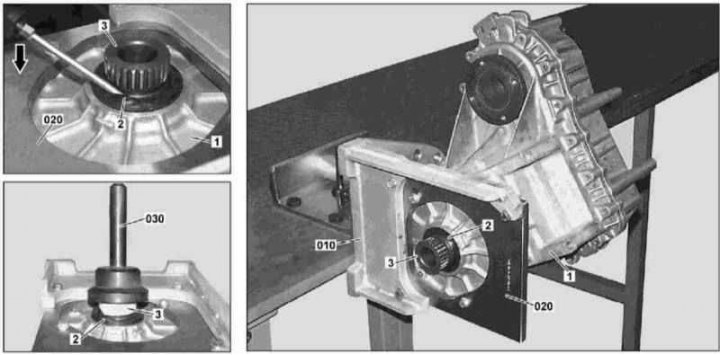
Replacing the transfer case input shaft seal
1 - Transfer case; 2 - Seal; 3 - Input shaft; 010 - Assembly stand; 020 - Support plate; 030 - Mandrel
1. Illustrative material on replacing the transfer case input shaft seal is presented in the illustration, to which all references in the text refer.
2. Remove the transfer case (1) (see Section Removal and installation the transfer case) and fix it to the mounting stand (010) using the support plate (020).
3. Using a screwdriver, remove the input shaft seal - try not to damage the sealing surfaces of the shaft journal and the seat in the crankcase.
4. To avoid damaging the new seal, wrap the splined portion of the shaft journal (3) with a layer of electrical tape.
5. Using a suitable mandrel, seat the new oil seal in its original place.
6. Remove the electrical tape and install the transfer case on the vehicle (see Section Removal and installation the transfer case).
7. Check the level of oil poured into the gearbox, and make the appropriate adjustments if necessary - the oil level should reach the lower edge of the inspection/filler hole.
8. Finally, start the engine and check the transfer case for signs of developing leaks.