
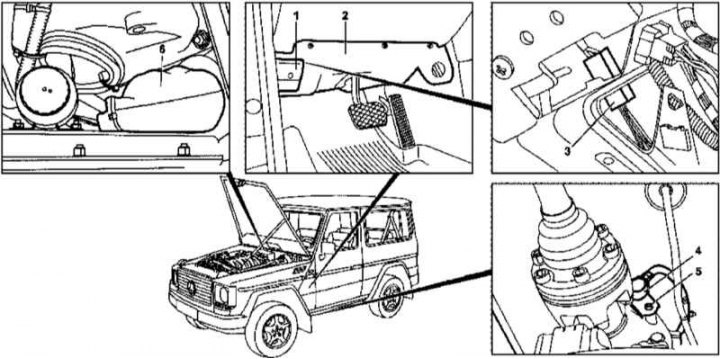
Installation details of the AT output speed sensor (1 of 2)
1 - The lever for releasing the latch of the hood lock; 2 - Cover; 3 - Connector; 4 - AT output speed sensor (B49); 5 - Bolt; 6 - Cable bushing
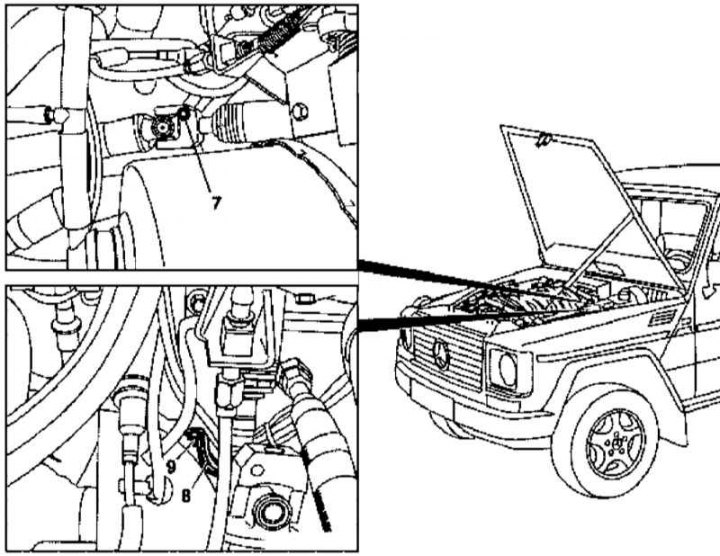
Installation details of the AT output speed sensor (2 of 2)
7 - Tie rod bolt; 8 - Mounting clamp; 9 - Nut
1. Remove the key from the ignition switch.
2. Remove the lever (1) releasing the hood latch.
3. Remove the cover (2) on the left under the instrument panel, - replace the broken clips.
4. Having previously marked, disconnect the connector (3).
5. Remove the fixing bandage.
6. Remove the bolt (7) tie rod mounts.
7. Loosening the nut (9), loosen the clamp (8).
8. Remove the bolt (5) and remove the transmission output speed sensor (4), - if necessary, prepare a replacement seal. Remove the installation label and transfer it to the new sensor.
9. Carefully release the sensor wiring from the grommet (6) in the engine compartment.
10. Installation is carried out in the reverse order.
11. In conclusion, clear the memory of the processor of the on-board self-diagnosis system.