
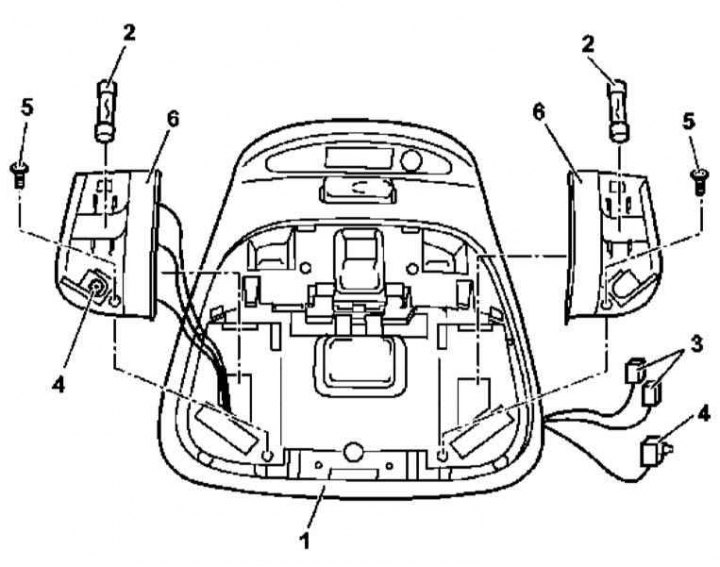
The design of the front saloon lamp
1. The design of the front saloon lamp is shown in the illustration, to which all references in the text refer.
2. Remove the overhead console (1).
3. Remove the lamp that needs to be replaced (2).
4. After releasing from the latches, remove from the console panel (1) lamp holders (3).
5. Remove from reflector (6) switch (4).
6. Remove the screws (5) and, prying, carefully release from the console panel (1) reflector (6) lamp.
7. Installation is carried out in the reverse order. In conclusion, check the correct functioning of the fixtures.
Rear light
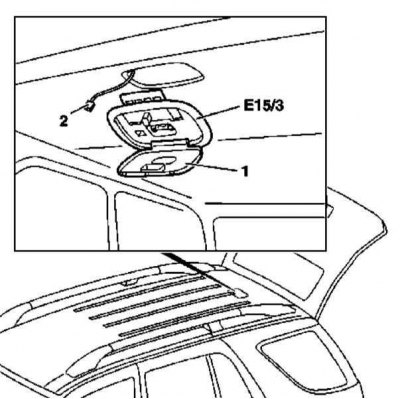
The design of the rear cabin lamp
1. The design of the rear saloon lamp is shown in the illustration, to which all references in the text refer.
2. Prying open the ceiling cover (1), lowering it all the way into the limiter.
3. If equipped, disconnect the Parktronic indicator display wiring connector.
4. Release the interior light assembly (Е15/3) headlining - pull the rear edge of the assembly down and at the same time push it forward.
5. Disconnect the connector (2) lamp wiring.
6. If necessary, remove the failed lamp.
7. Installation is carried out in the reverse order. Make sure the lamp is working properly.