



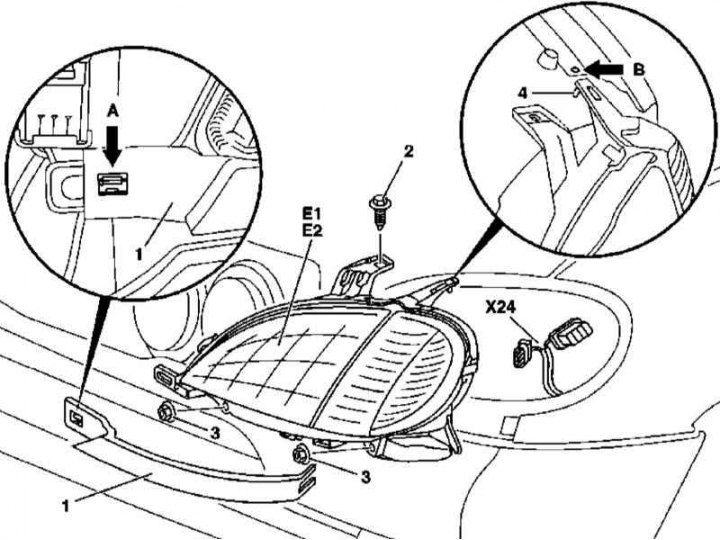
Headlight installation details
1. The details of the installation of the headlights are shown in the illustration, to which all references in the text refer.
2. Open the hood.
3. Release the lock (arrow A) under the lamp holder and remove the cover (1).
4. Unscrew the screws (2) and remove the nuts (3).
5. Using a punch (4), release the support from the receiving hole and remove the headlight (E1 or E2) by pulling it forward.
6. Disconnect the electrical wiring connector (X24).
7. Installation is carried out in the reverse order - make sure that the fasteners are securely snapped into place and that the cover is positioned evenly relative to the bumper.
8. Finally, check that the headlights are functioning properly and are adjusted correctly.
Replacing lamps
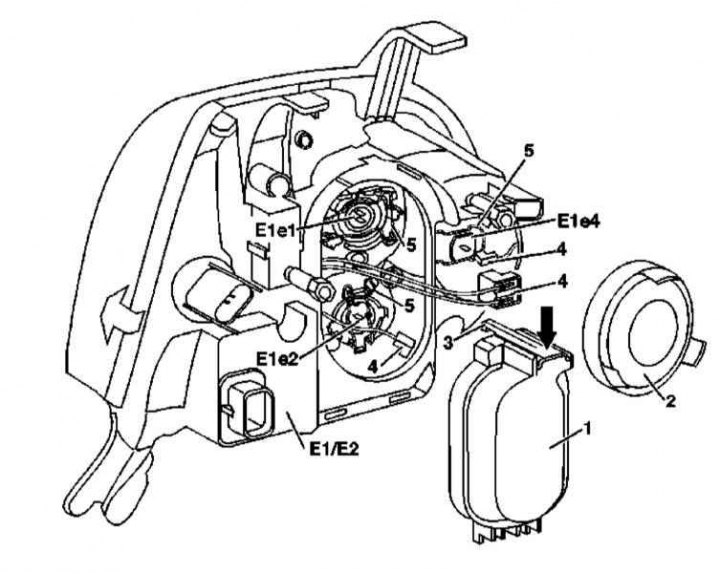
Headlight bulb installation details
E1e1 - High beam lamp; E1e2 - Low beam lamp; E1e4 - Fog light bulb; E1 - Left headlight; E2 - Right headlight
1. The relevant illustrative material is presented in the illustration, to which all references in the text refer.
2. Open the hood and fix it in a vertical position.
3. Press the latch lever (3) in the direction indicated by the arrow, release and remove the cover (1).
4. Remove the cover (2).
5. Disconnect the electrical wiring connectors (4) of the lamps.
6. Release the corresponding lock (5) and remove the lamp that needs to be replaced (E1e1, E1e2 or E1e4), - try not to touch the bulbs with bare fingers (it is best to do the work wearing clean cotton gloves).
Full article available on the resource: MercedesMan
7. Installation is carried out in the reverse order - make sure that the lamp is securely fixed in the socket.