
Regular pointers

On AMG models, the direction indicator lenses are covered from the outside by a protective grille

Lens (1) turn signal on standard models
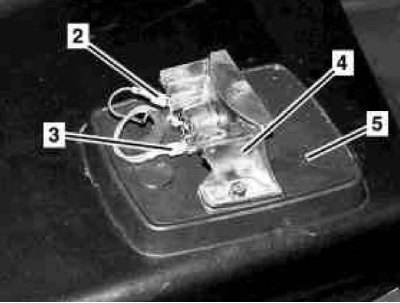
Turn signal design
2, 3 - Wiring connectors; 4 - Lamp holder; 5 - Support platform
1. Remove the corresponding headlight (see Section Removal and installation of block headlights, replacement of lamps, adjustment of the direction of optical axes).
2. On models 463.246, remove the protective grill (A) turn signal lenses.
3. Pry up and remove from the support platform (5) lens (1).
4. Label, disconnect and insulate connectors (2 and 3) wiring.
5. While holding the nuts of the mounting screws through the headlight landing window from turning, release the fasteners and remove the support platform (5) turn signal assembly with lamp holder (4).
6. Installation is carried out in the reverse order.
Repeaters built into door mirror assemblies
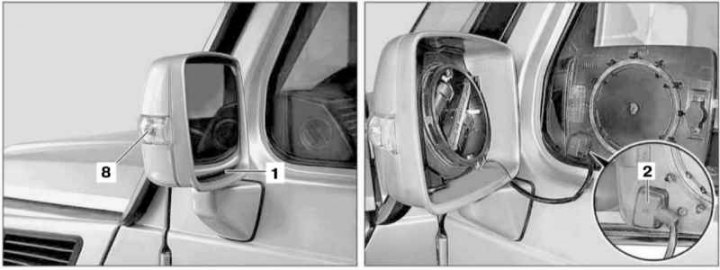
Details of installation of the turn indicator repeater built into the door mirror assembly (1 of 3)
1 - Mirror lens; 2 - Electrical wiring connector for mirror heating; 8 - Turn signal repeater
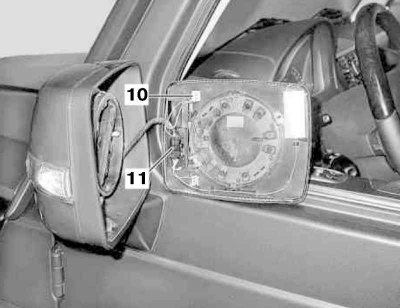
Details of installation of the turn indicator repeater built into the door mirror assembly (2 of 3)
10 - Flat connector; 11 - Plug connector
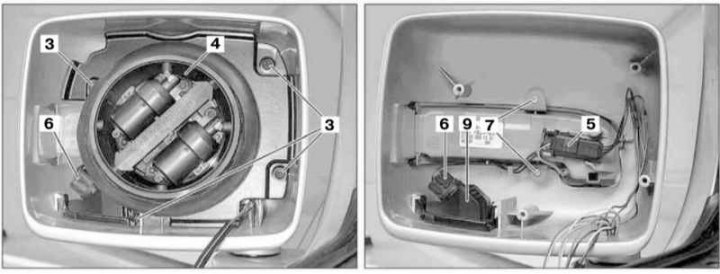
Details of installation of the turn indicator repeater built into the door mirror assembly (3 of 3)
3, 7 - Screws; 4 - Regulator; 5 - Plug connector; 6 - Support for side lighting; 9 - Side lighting lamp
1. Push the mirror lens all the way down (1), then carefully release it from the latches.
2. On models without an automatic reflective brightness control device, disconnect the connector (2) mirror heating wiring.
3. On models with automatic reflective brightness control, disconnect the flat connector (10) and plug connector (11).
4. Turn out fixing bolts (3) and remove the regulator assembly (4).
5. Remove the bayonet-locked support (6) turn signal repeater.
6. Remove the screws (7) and remove the repeater lamp (8).
7. If necessary, release the latches and remove the headlight from the mirror casing (9).
8. Installation is carried out in the reverse order.