
Details of the expansion tank for accumulation of fuel vapors on models 163.113, 163.154 and 163.128 of the corresponding configuration
Details of the expansion tank for accumulation of fuel vapors on models 163.113, 163.154 and 163.128 of the corresponding configuration
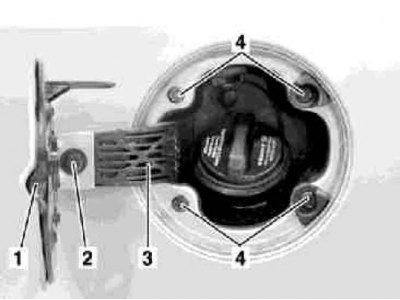
1. The installation details of the expansion tank for the accumulation of fuel vapors on models of the corresponding configuration are shown in the illustrations, which include all references in the text.
2. Remove the fuel filler cap (1).
3. Translate the loop (3) to the closed position.
4. Turn out bolts (4).
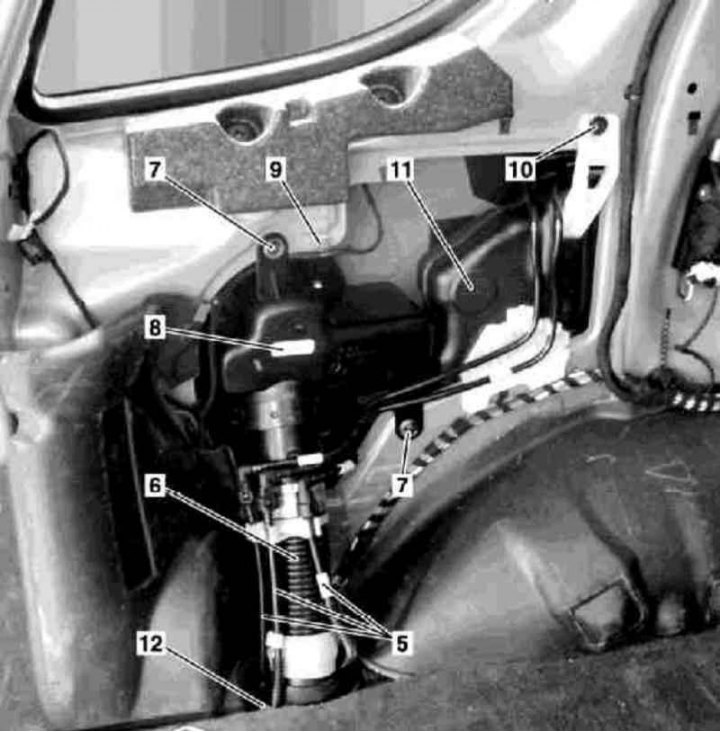
5. Remove panels of finishing of a rack With.
6. Separate from the filler neck (6) ventilation lines (5).
7. Turn out bolts (7) bracket (8) filler neck (5).
8. Remove the retainer from the body element (9).
9. Turn out a fixing bolt (10) and pull back the expansion tank (11) forward.
10. Loosen the rubber seal (12) neck (6) on the floor of the car.
11. Remove the filler neck assembly with support bracket from the C-pillar.
12. Remove the expansion tank from the C-pillar (11).
13. Installation is carried out in the reverse order - when installing the latch (9) make sure that the wiring runs under the bracket (8), the threaded part of the bolt (2) lid hinge fasteners must be lubricated with a fixing sealant before screwing in. Check that the filler cap is properly adjusted (1).