
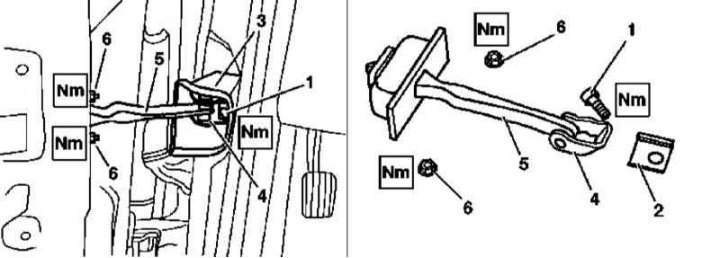
Installation details and design of the side door opening limiter
1 - Bolt; 2 - The holder of the sealing element; 3 - Sealing element; 4 - Support bracket; 5 - Limiter; 6 - Nut
1. The relevant illustrative material is presented in the illustration, which includes all references in the text.
2. Remove the inner lining of the corresponding door and separate the front edge of the sealing film (see Section Removal and installation of panels of an internal upholstery of door assemblies).
3. Remove the screw (1) limiter mountings (5) to the respective (A or B) rack, - try not to damage the paintwork.
4. Holding the stopper (5), loosen the nuts (6) fastening it to the door assembly.
5. Remove the stopper by releasing it from the service window in the door frame.
Note. Release the rubber seal of the power window guide channel from the retainer and slide it along the limiter bar.
6. Installation is carried out in the reverse order, - make sure that the window lifter guide groove seal is seated correctly, the screw (1) lubricate the limiter to the post before screwing it in with glue, if necessary, replace the damaged sealing film of the door assembly.