



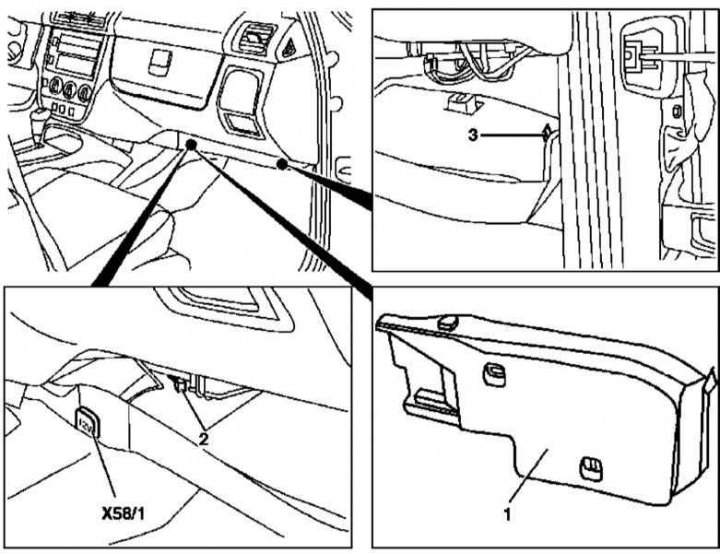
Installation details of the right lower cover of the instrument panel (version 1 - models 163.136/154/172 with VIN to A145272, X708318)
1. Installation details of the right lower cover of the instrument panel version 1 (models 163.136/154/172 according to A145272, according to X708318) are shown in the illustration, to which all references found in the text refer.
2. Release the latch (3) on the heater fan assembly.
3. Release the cover (1) from the two fasteners (2).
4. Disconnect the electrical wiring from the on-board power supply socket (X58/1) and remove the cover completely.
5. Installation is carried out in reverse order.
Version 2
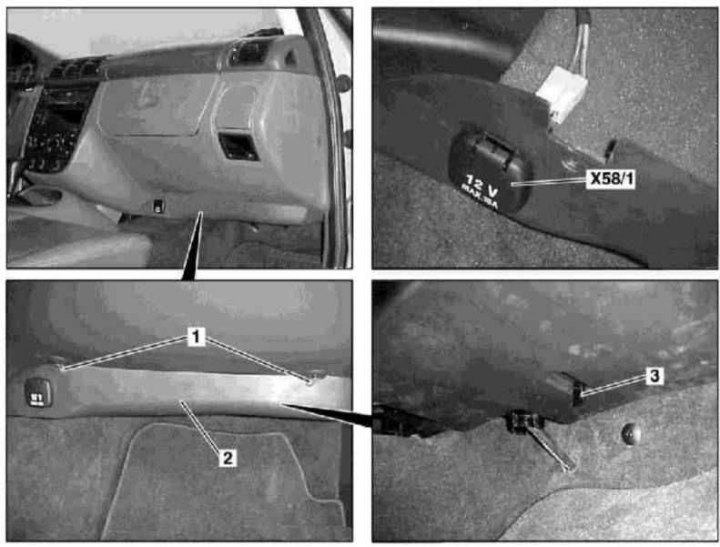
Installation details of the right lower cover of the instrument panel (version 2 - models 163.113/128/157/174/175 and 163.136/154/172 with VIN A145273, X708319)
1. Installation details of the right lower cover of the instrument panel version 2 (models 163.113/128/157/174/175 and 163.136/154/172 with A145273, with X708319) are shown in the illustration, to which all references found in the text refer.
2. Unscrew the screws (1) securing the cover (2).
3. Turn the locking lever (3) down and lower the cover (2).
4. Disconnect the electrical wiring from the on-board power supply socket (X58/1) and remove the cover completely.
[Full article available on the resource: MercedesMan.ru]
5. Installation is carried out in reverse order.
Left cover
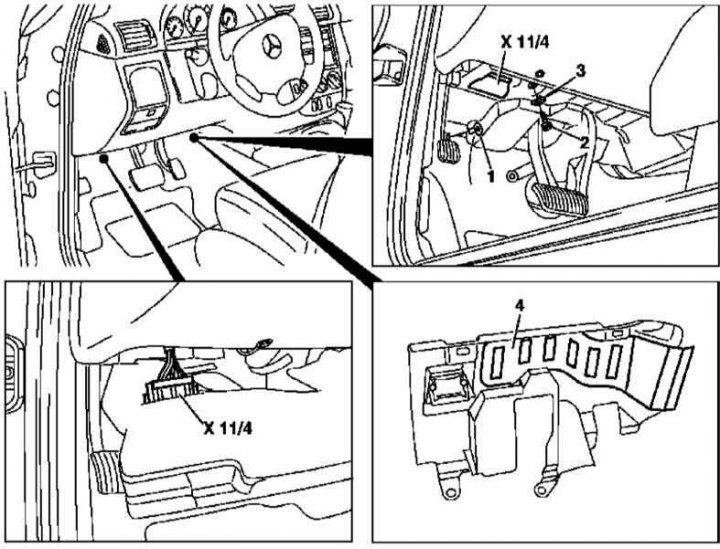
Installation details of the left lower cover of the instrument panel (all models)
1. The details of installing the left lower instrument panel cover are shown in the illustration, to which all references in the text refer.
2. Remove the two plugs (1).
3. Remove the two screws (2).
4. Unlock and remove the DLC diagnostic connector (X11/4).
5. After releasing the clamps (3), remove the cover (4).
6. Installation is carried out in reverse order.