
2. Turn off the ignition.
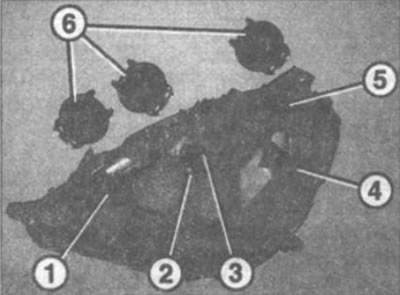
26.0 Headlight bulbs
1 - fog light bulb
2 - high beam bulb
3 - parking lights bulb
4 - low beam bulb
5 - turn signal light
6 - light bulb covers
Attention! Depending on the year of manufacture, the removal and installation of headlight bulbs is possible either from the engine compartment or through the holes in the wheel arches, which are closed with covers. Bulb holders are clamped or held by metal latches.
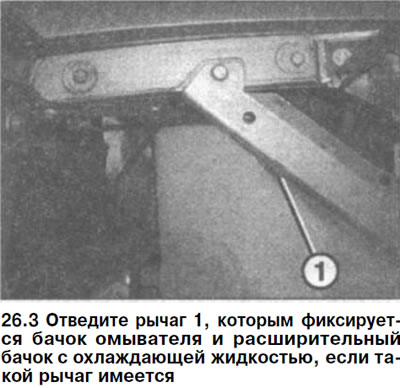
3. Removing bulbs through the engine compartment. Open the hood. Remove lever 1, which fixes the washer reservoir and expansion tank with coolant, if such a lever is available (see illustration).
4. Remove the tanks and fix them on the body away from the place of work.
5. Removing the bulbs through the hole in the wheel arch. Vehicles manufactured before 2/01. Turn the latches 2 securing the cover 1 hole to the left a quarter of a turn and remove the cover (see illustration).

6. Press the leash of cover 6, which covers the bulb, and remove the cover (see illustration 26.0).
7. Disconnect the bulb plug.
8. Light bulbs with clamp (knife) patron. Cars of release since 3/01. Turn the cartridge to the left and remove the defective light bulb.
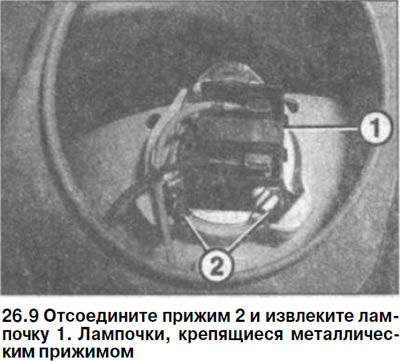
9. Light bulbs with a metal clip. Disconnect clamp 2 and remove bulb 1 (see illustration).
Installation
10. Install a new light bulb.
11. Bulbs with a knife cartridge. Insert the bulb holder and turn it to the right until it locks into place.
12. Light bulbs with a metal clip. Install the socket together with the light bulb and clamp it with a clamp.
13. Connect the light bulb power plug.
14. Replace the cover that covers the light bulb and fix it.
15. Removing bulbs through the engine compartment. Install the coolant expansion tank. Insert the ledge on the washer reservoir into the recess. Lock the tanks with a lever.
16. Removing the bulbs through the hole in the wheel arch. Vehicles manufactured before 2/01. Cover the mounting hole in the wheel housing.